Custom Listings
Overview
In addition to the three built-in types of listings, you can also build a completely custom display of the items. This custom display can generate any HTML and can optionally still take advantage of the sorting, filtering, and pagination provided by listings.
Listing Templates
To use a custom template, add the template option to your listing configuration:
index.qmd
---
listing:
  contents: posts
  template: gallery.ejs.md
---
Quarto passes the listing contents to the template as an array called items. Each item is populated with the fields described in Listing Fields, plus any custom metadata from the document.
The template uses EJS to combine HTML and JavaScript (inside <% %> tags) to process items. For example, this template constructs a list of links by looping through items and accessing the path and title fields:
gallery.ejs.md
```{=html}
<ul>
<% for (const item of items) { %>
  <li><a href="<%- item.path %>"><%= item.title %></a></li>
<% } %>
</ul>
```
The result is a simple bulleted list of links to the documents in the listing:

Quarto processes EJS templates as Markdown, so we recommend using the .ejs.md extension for your template files. Since most templates output HTML, wrap your HTML in a raw block (```{=html}) to avoid performance issues and escaping problems.
If you want a field like title to support Markdown formatting (e.g., My **bold** title), exit the raw HTML block to output the Markdown content, then re-enter it:
gallery.ejs.md
```{=html}
<ul>
<% for (const item of items) { %>
  <li><a href="<%- item.path %>">
```
<%= item.title %>
```{=html}
  </a></li>
<% } %>
</ul>
```Use <%- value %> to escape HTML characters in a value, or <%= value %> to output without escaping:
HTML escaped value:   <%- value %>
HTML unescaped value: <%= value %>
This syntax comes from lodash, which Quarto uses to render EJS templates.
Metadata Listings
The contents option for a listing most commonly contains a list of paths or globs, but it can also contain metadata. When contents are metadata, the metadata will be read into items and passed to the template. For example:
index.qmd
---
listing:
  template: custom.ejs.md
  contents:
    - name: First Item
      href: https://www.quarto.org
      custom-field: A custom value
    - name: Second Item
      href: https://www.rstudio.org
      custom-field: A second custom value
---
could be rendered using:
custom.ejs.md
```{=html}
<ul>
<% for (const item of items) { %>
<li>
<a href="<%- item.href %>"><%= item.name %></a><br/>
<%= item['custom-field'] %>
</li>
<% } %>
</ul>
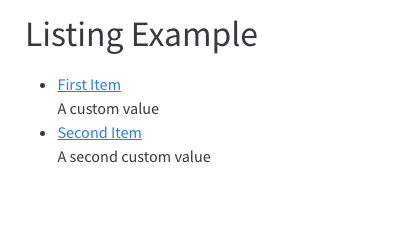
```which produces a simple HTML display like:
Metadata File Listings
The contents option for a listing can also point to one or more yaml files (which contain metadata). In that case, the metadata will be read from the files into items and passed to the template. For example:
index.qmd
---
listing:
  template: custom.ejs.md
  contents:
    - items.yml
---
where the contents of items.yml is:
items.yml
- name: First Item
  href: https://www.quarto.org
  custom-field: A custom value
- name: Second Item
  href: https://www.rstudio.org
  custom-field: A second custom value
Template Examples
Portions of this website are built using custom listings. The best place to start is with our gallery, which is a listing built using a custom template and a metadata file. You can view the source code used to create the gallery page in our Github repository.
| File | Description |
|---|---|
| gallery.yml | The metadata that controls what items are displayed in the gallery listing. |
| gallery.ejs | The template used to display the items on the page. |
| index.qmd | The Quarto document that configures and positions the listing in the #gallery div. |
The gallery.ejs template wraps all content in a raw HTML block, so Markdown formatting is not processed.
Sorting, Filtering, and Pagination
By default, sorting, filtering, and pagination are disabled for custom listing templates. To enable them, include the following in your template:
Include a
listclass on the HTML tag that contains the list of items.For each item, include
<%= metadataAttrs(item) %>in the HTML tag that contains the item. Quarto uses these attributes for sorting and filtering.Within each item, include a class that identifies the tag whose text represents the contents of an item’s field. The class must be the name of the field prefixed with
listing-, for example the tag whose inner text is theitem.nameshould include a classlisting-name.
For example, modify the above custom.ejs.md template as follows:
custom.ejs.md
```{=html}
<ul class="list">
<% for (const item of items) { %>
  <li <%= metadataAttrs(item) %>>
    <a href="<%- item.href %>" class="listing-name"><%= item.name %></a><br/>
    <span class="listing-custom-field"><%= item['custom-field'] %><span>
  </li>
<% } %>
</ul>
```
Once you have included these items in your template, you can then enable the options in your listing:
index.qmd
---
listing:
  sort-ui: true
  filter-ui: true
  page-size: 10
---
The UI elements will now appear on the page and should interact properly with your custom listing.
Field Display Names
You may want to provide a custom display name for your field to provide a better name than the field name. For example, the field name would appear in the sort UI. You can use field-display-names to create mapping from a field to a display name. For example:
index.qmd
---
listing:
  template: custom.ejs.md
  contents:
    - items.yml
  sort-ui: true
  filter-ui: true
  page-size: 10
  field-display-names:
    name: "Name"
    custom-field: "Custom"
---
Date Sorting and Formatting
To properly format and sort date values, you can specify type information for fields in your items. If you specify a field is a date, it will automatically be formatted using the specified date formatting (either default or specified using date-format) and will support date sorting in ascending or descending order. If you specify a field as a number, it will support ascending and descending numeric sorting.
You can specify field types as follows:
index.qmd
---
listing:
  template: custom.ejs.md
  contents:
    - items.yml
  field-types:
    custom-date: date
    custom-number: number
---
Required Fields
Since listings are generated using fields that are specified in other documents or via metadata, it can be helpful to ensure that required fields are present. You can note required fields as following:
index.qmd
---
listing:
  template: custom.ejs.md
  contents:
    - items.yml
  field-required: [name, custom-field]
---
If the listing page is rendered and any of contents is missing a value for either of the required fields, an error will be thrown noting the field that is required and the file or metadata that has omitted it.
Template Parameters
You may also make your custom template more dynamic by using parameters to control its behavior. You can provide parameters for custom templates using the template-params option like:
index.qmd
---
listing:
  template: custom.ejs.md
  contents:
    - items.yml
  template-params:
    param1: "param-value"
---
Template parameters can then be accessed in your template using <%= templateParams.param1 %>. For example, modify the above custom.ejs.md template as follows:
custom.ejs.md
### <%= templateParams.param1 %>

```{=html}
<ul class="pub-list list">
  <% for (const item of items) { %>
      <li <%= metadataAttrs(item) %>>
        <span class="listing-title"><%= item.title %>.</span>
      </li>
  <% } %>
</ul>
```