Shiny Reactives
Overview
Earlier we described how to use the ojs_define() function to make data from Python and R available in OJS cells. In this scenario, data pre-processing is done once during render time then all subsequent interactions are handled on the client.
But what if you want to do data transformation dynamically in response to user inputs? This is also possible with ojs_define(), as it can be passed not just static values but also Shiny reactives (assuming it’s running inside a Shiny interactive document).
Hello, Shiny
Here is the K-Means Clustering example from the Shiny Gallery implemented with an OJS client and Shiny Server:
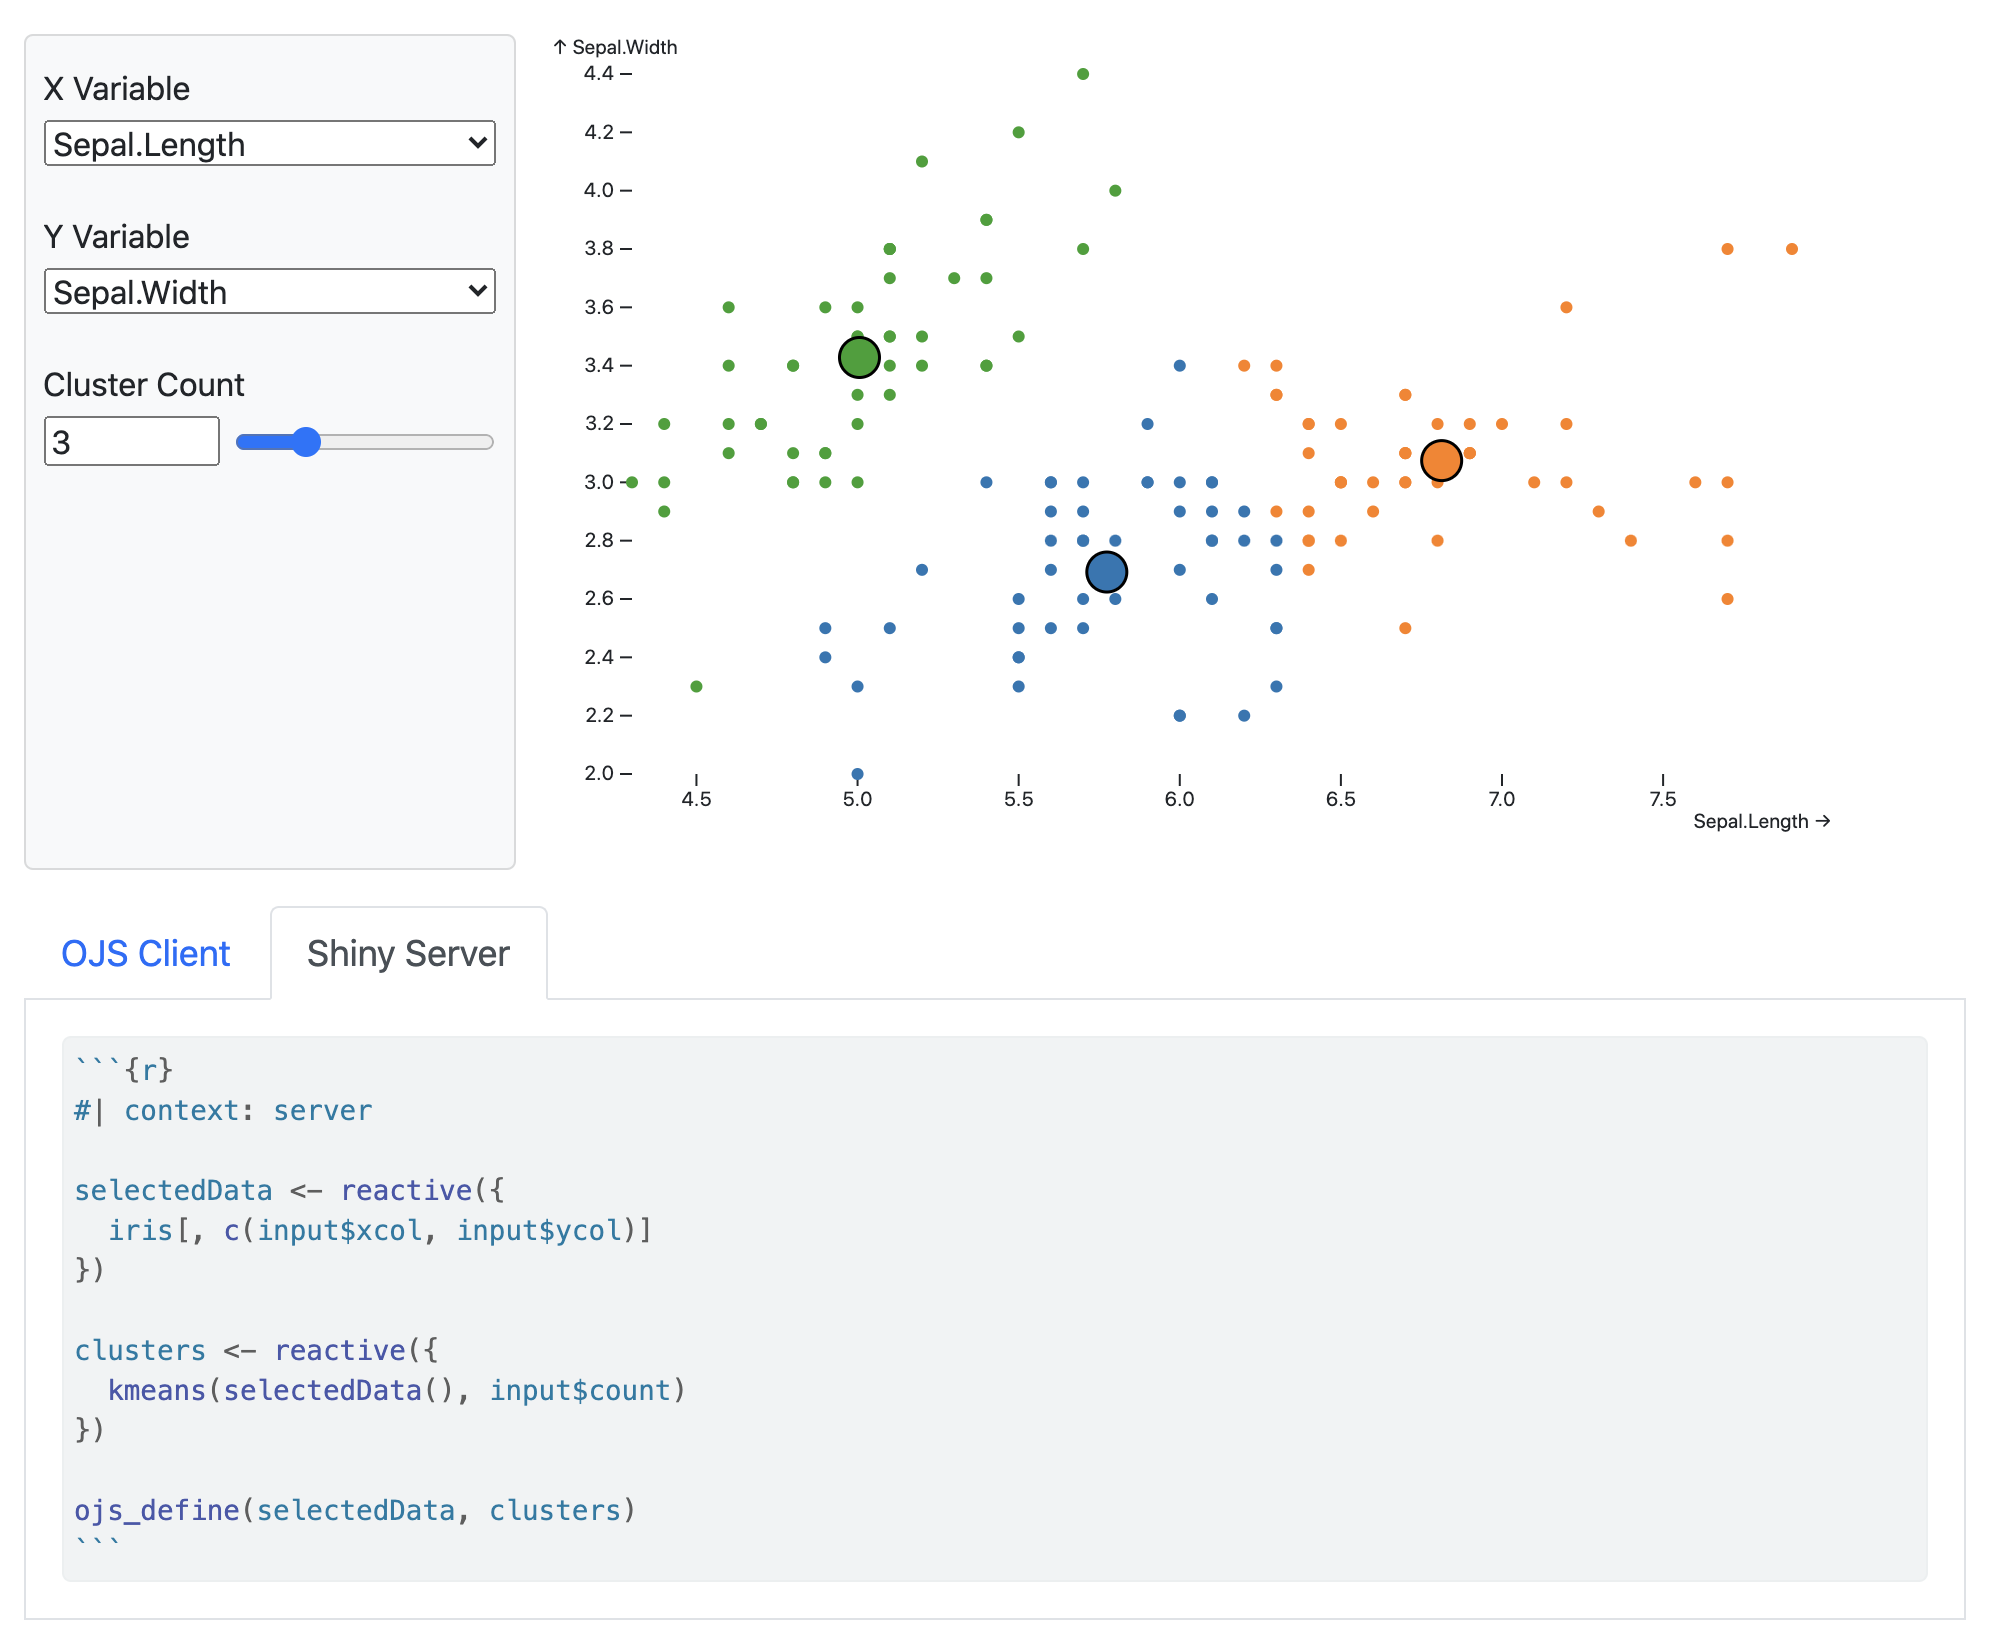
You can see the document deployed at https://jjallaire.shinyapps.io/kmeans-shiny-ojs/.
Source Code
Let’s take a look at the source code. On the client we have familiar looking OJS inputs and a plot laid out using panel: sidebar and panel: fill:
```{ojs}
//| panel: sidebar
vars = ["Sepal.Length", "Sepal.Width", "Petal.Length", "Petal.Width"]
viewof xcol = Inputs.select(vars, {label: "X Variable"})
viewof ycol = Inputs.select(vars, {label: "Y Variable", value: vars[1]})
viewof count = Inputs.range([1, 9], {label: "Cluster Count", step: 1, value: 3})
```

```{ojs}
//| panel: fill
Plot.plot({
  color: {
    type: "ordinal",
    scheme: "category10"
  },
  marks: [
    Plot.dot(transpose(selectedData), {
      x: xcol,
      y: ycol,
      fill: (d, i) => clusters.cluster[i],
    }),
    Plot.dot(clusters.centers, {
      x: d => d[0],
      y: d => d[1],
      r: 10,
      stroke: "black",
      fill: (d, i) => i + 1
    }),
  ]
})
```
Note that the plotting code references the variables selectedData and clusters. These will be provided by reactive expressions within the Shiny server code. Note also that we use the transpose() function to reshape the data into the row-oriented format that the Plot library expects.
Here is the server code:
```{r}
#| context: server

selectedData <- reactive({
  iris[, c(input$xcol, input$ycol)]
})

clusters <- reactive({
  kmeans(selectedData(), input$count)
})

ojs_define(selectedData, clusters)
```
We designate this code as running on the server via the context: server option.
Note that we reference several inputs that were defined by viewof expressions on the client (e.g. input$xcol). When these inputs change they will cause the appropriate server side reactives to re-execute.
We create two reactive values (selectedData and clusters) and provide them to the client using ojs_define(). The plot will be automatically re-drawn on the client side when these values change.
Examples
Here are some examples that demonstrate various ways to use OJS with Shiny:
| Example | Source | Description |
|---|---|---|
| K-Means | Code | Simple example of binding OJS inputs to Shiny inputs and shiny reactives to OJS plots. |
| Binning | Code | Demonstrates fast binning of a medium sized dataset (32mb) on the server. |
| Data Binding | Code | Demonstrates importing a notebook from https://observablehq.com and binding its data field to a Shiny reactive. |
Bindings
OJS to Shiny
In the example above we took advantage of the fact that by default OJS viewof expressions are automatically propagated to Shiny inputs (e.g input$xcol). This provides a reasonable separation of concerns, and prevents excess network traffic in the case that you have large OJS variables.
However, if you want to use other OJS variables as Shiny inputs this is also possible using the ojs-export option. The default behavior maps to the following configuration:
---
server:
  type: shiny
  ojs-export: viewof
---
You can also specify ojs-export: all to cause all OJS reactives to be bound to Shiny inputs:
---
server:
  type: shiny
  ojs-export: all
---
Alternatively, you can specify a list of OJS reactives by name (including using ~ to filter out reactives), and optionally combine this with the viewof and/or all options. For example:
---
server:
  type: shiny
  ojs-export: [all, ~large_dataset]
---
Shiny to OJS
Less common but occasionally useful is the ability to bind Shiny inputs into OJS. By default no such bindings occur, however you can use the ojs-import option to opt-in for specific Shiny inputs. For example:
---
server:
  type: shiny
  ojs-import: [minimum, maximum]
---