Publishing Quarto Manuscripts
Overview
This page is a continuation of the Authoring Manuscripts tutorial. We’ll assume you’ve cloned the template repository, have made some changes, and are happy with the preview generated by Quarto.
Publishing a Quarto manuscript is the process of taking the preview you’ve been viewing on your computer and making it available to anyone on the web.
We’ve set up the template manuscript to include most of the scaffolding needed to publish your manuscript to your repository’s GitHub Pages site. Publishing your manuscript website is as simple as pushing your changes to your repo.
Since a Quarto manuscript is a special type of Quarto website, you can publish it any way you can publish a Quarto website. If GitHub Pages doesn’t suit your needs you can learn about other options in Publishing.
On this page, you’ll change one setting in your GitHub repo to authorize read and write permissions for GitHub Actions, then walk through the publishing process.
Authorize GitHub Actions
The template manuscript is configured with a GitHub Action in .github/workflows/publish.yml. This action is triggered when there is a push to the main branch; it renders your manuscript and puts the manuscript website source on the gh-pages branch.
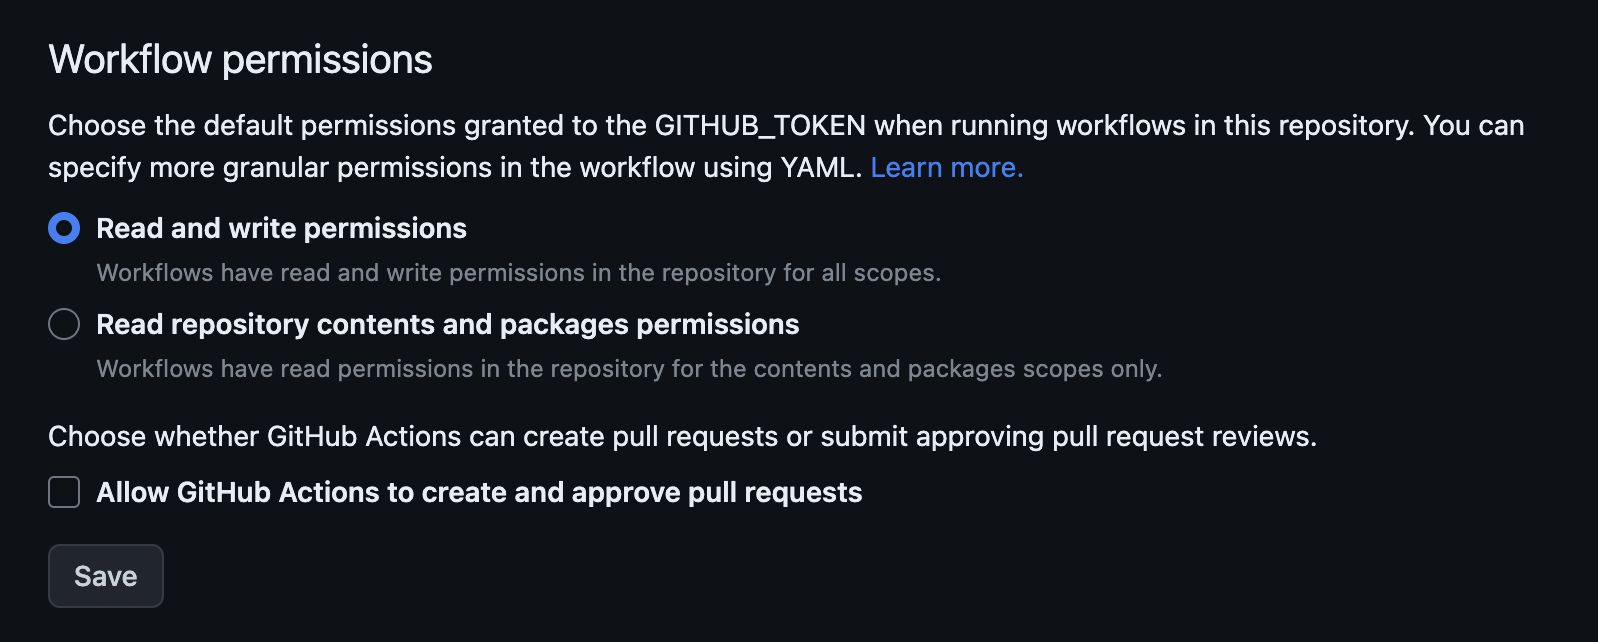
To ensure the action has permission to write to the gh-pages branch, you’ll need to make one change to your repository settings. Go to your repository and navigate to: Settings > Actions > General > Workflow Permissions. Check the “Read and Write Permissions” box.
The GitHub Action in .github/workflows/publish.yml does not set up any computational environments (e.g. Python or R), so is unable to evaluate code.
Jupyter notebooks (.ipynb) include their output and do not need any special treatment. However, if your manuscript includes Quarto files (.qmd), you must first render locally to update the saved computational outputs in the _freeze directory.
If you instead want your GitHub Action to also evaluate code, read how to set it up in the Executing Code section on the Publishing to GitHub page.
Push to Publish
Publishing this manuscript to GitHub Pages is as simple as committing and pushing your changes, however we advise a full render first. On the Terminal, in your manuscript directory, run:
Terminal
quarto renderThe Render button in RStudio runs the command quarto preview, not quarto render. You’ll need to explicitly run quarto render on the Terminal.
Unlike quarto preview which generates outputs as needed, quarto render will generate all outputs (all the article formats and the manuscript website). It is also the command that will be run by the GitHub action, so verifying it locally first is a good way to avoid issues on GitHub.
If the render runs without issue, stage your changes.
We’ve added a few lines to .gitignore to ignore common files Quarto creates in the rendering process that don’t need to be checked into version control. This means the files to stage should be the notebooks, and possibly items in the _freeze directory.
If you’ve added any files to the project that you don’t want to be pushed to GitHub, double-check you haven’t staged them for the commit.
Commit and push your changes to GitHub.
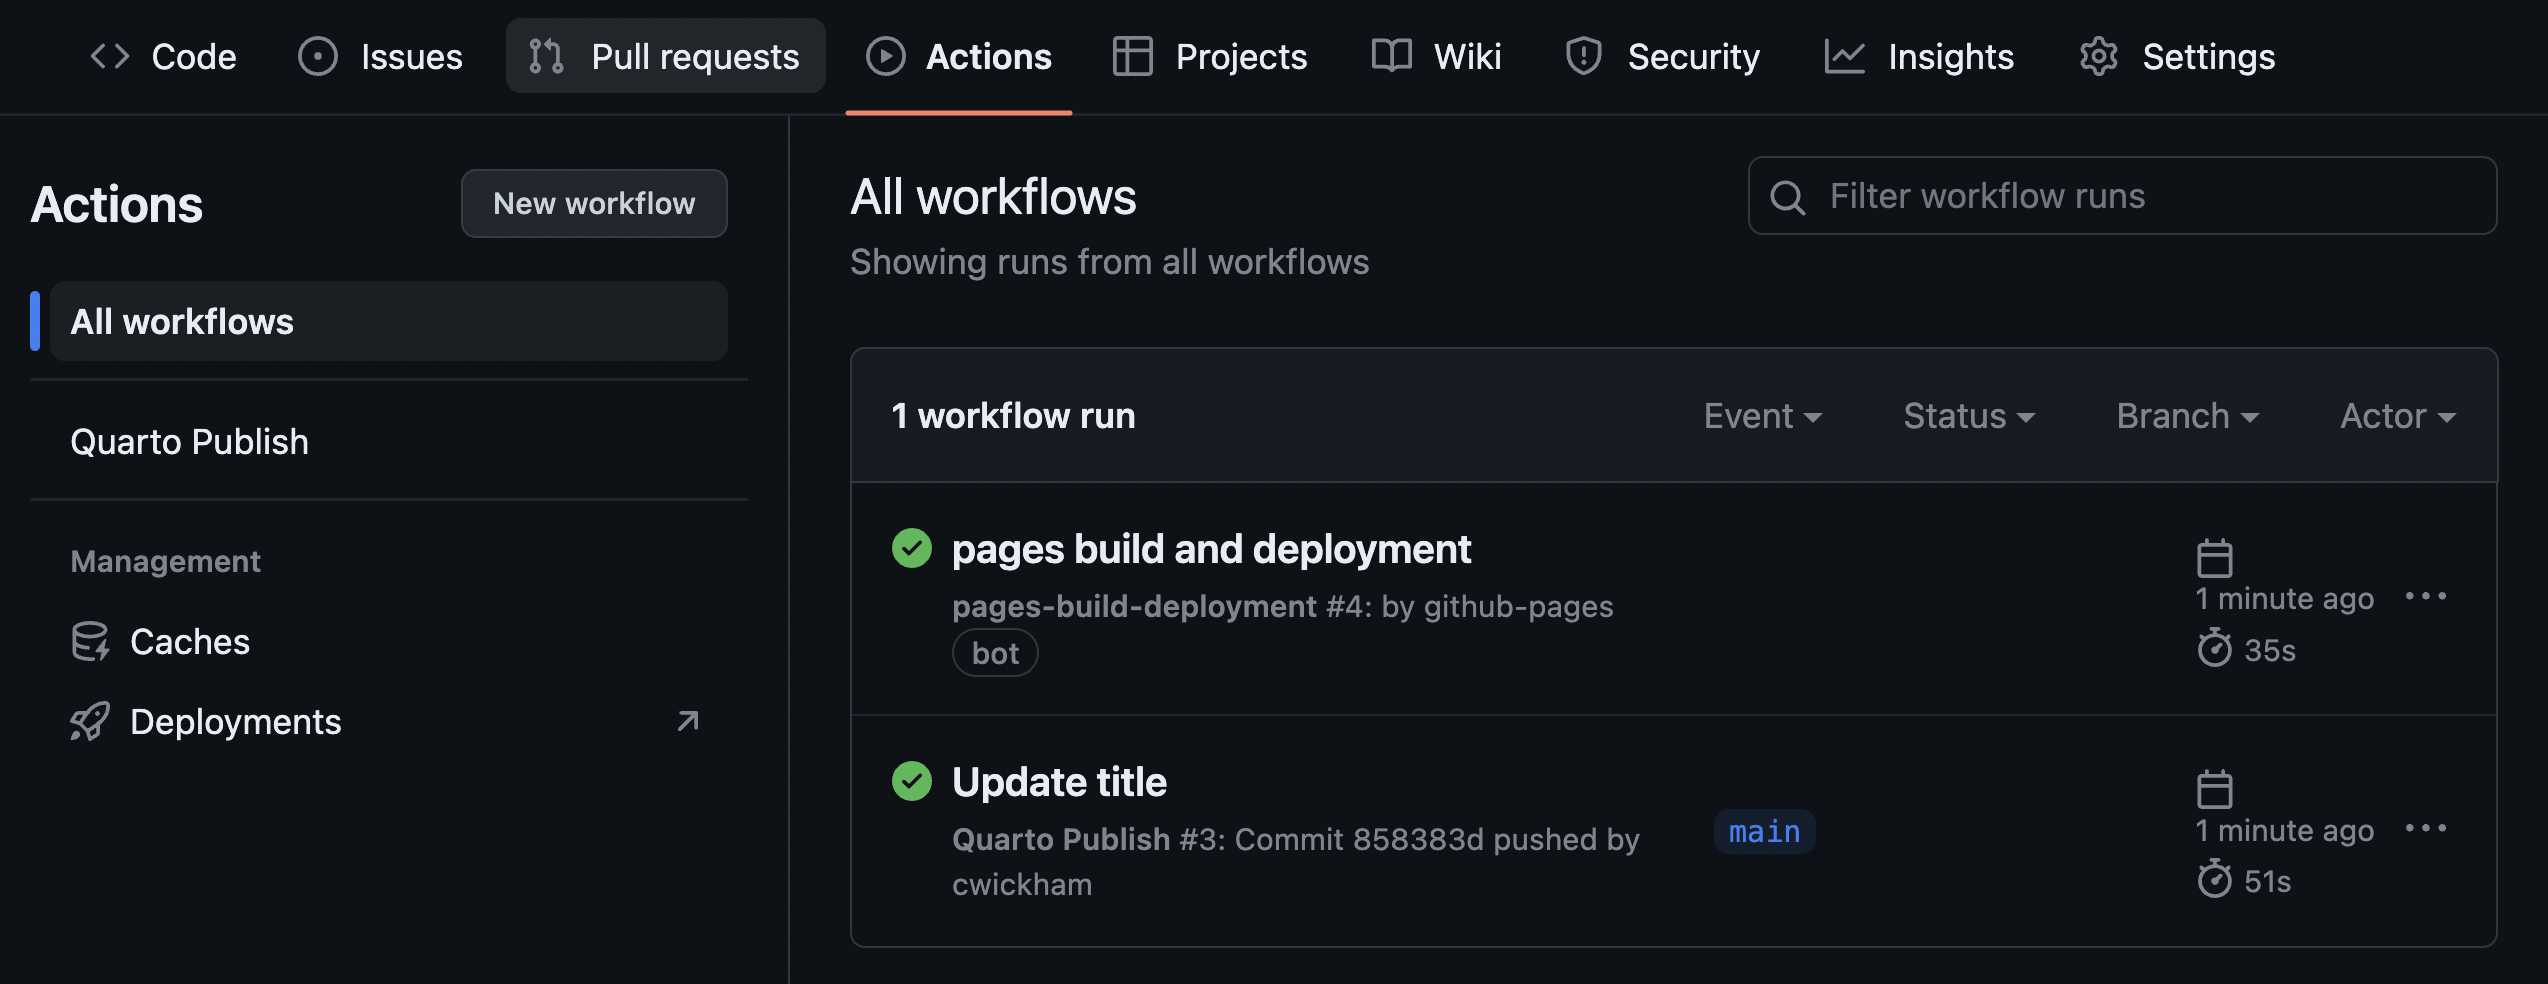
Once pushed, you should see the actions trigger in GitHub: “Quarto Publish” is the action we’ve added to render the site and push it to the gh-pages branch; “pages-build-deployment” is GitHub’s action to deploy the gh-pages branch to your GitHub Pages URL.
Once both actions are complete, navigate to your repository’s GitHub Page.
You can find your GitHub Pages website address in the Settings for your repository on GitHub under Pages.
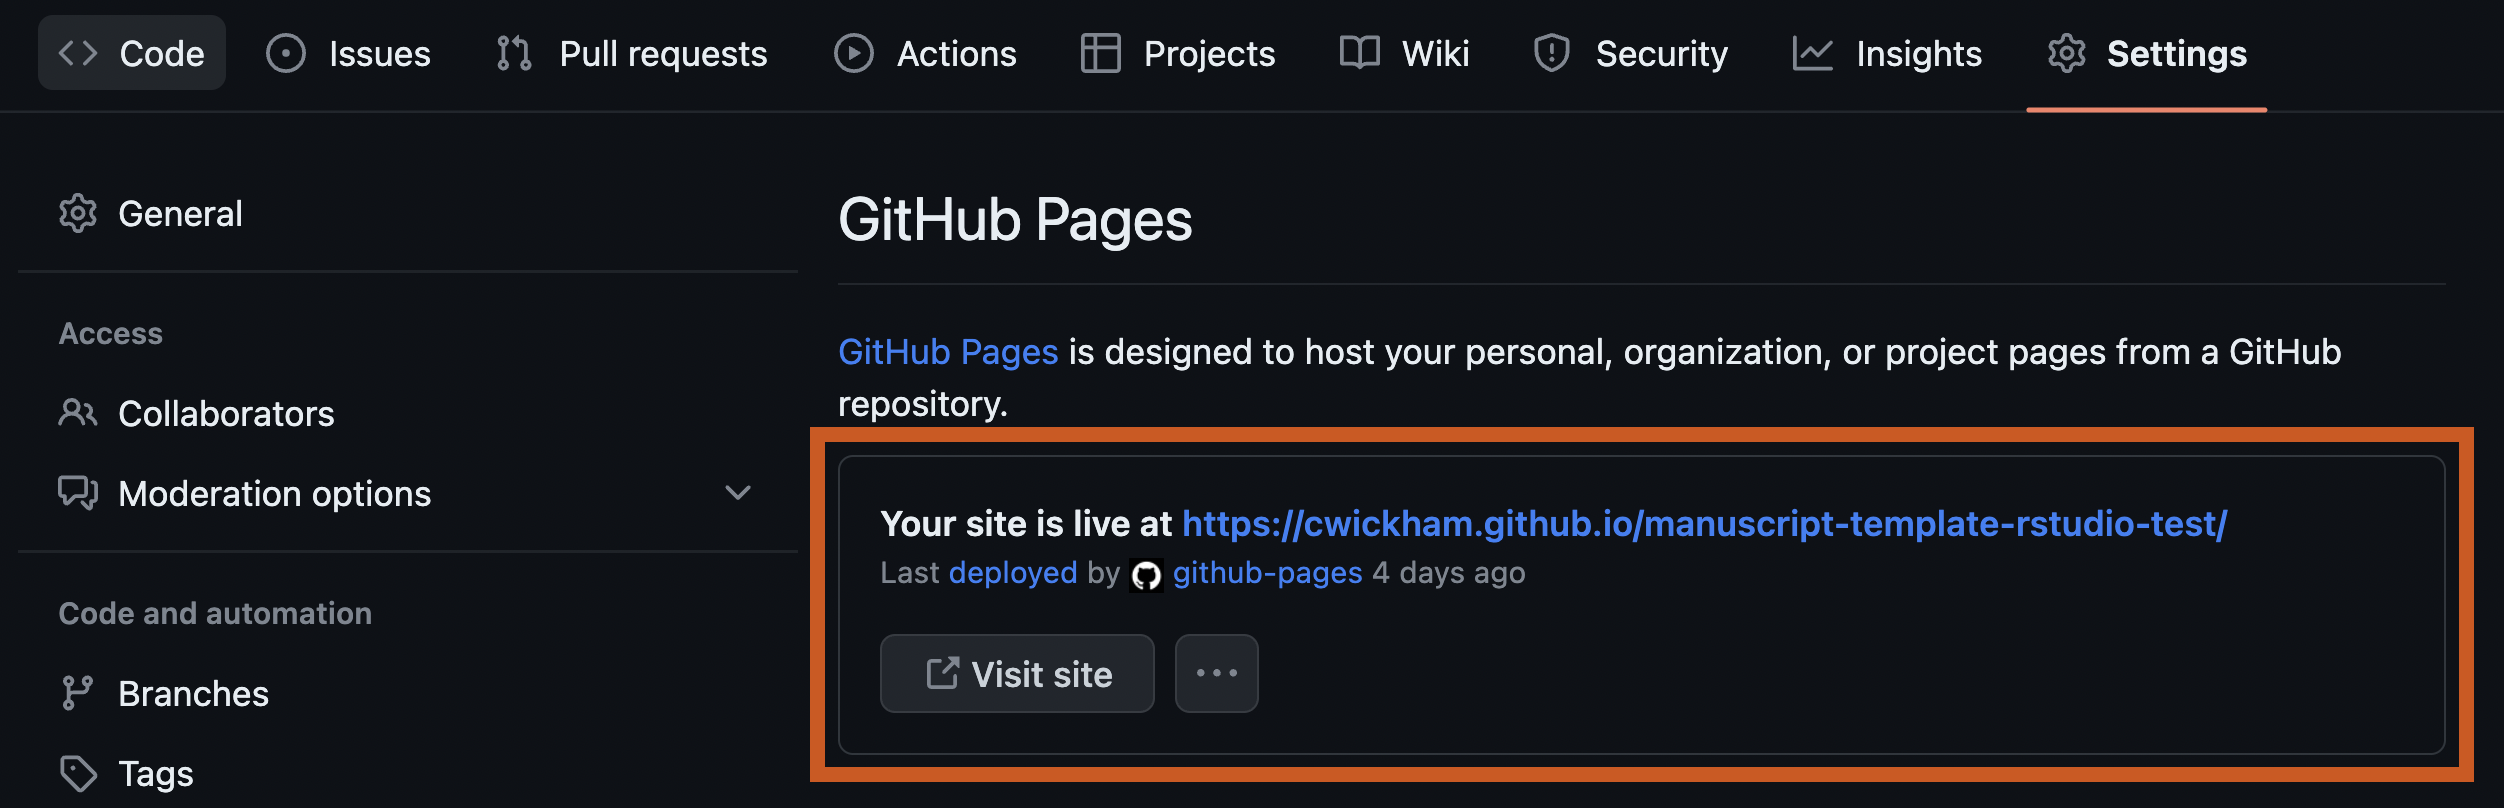
Your manuscript is now published!
What Next?
You’ve now been through the full workflow of a Quarto manuscript: authoring content, previewing the generated manuscript and publishing it to GitHub Pages. When you are ready to dive into more detail, we have some recommendations on Next Steps.