Running Dashboards
Overview
There are a number of ways to run Shiny for Python interactive documents:
- Use the Quarto: Preview command within VS Code or Positron.
- Use the
quarto previewcommand line interface with any editor. - Deploy them to a server for use by a wider audience.
We’ll cover all of these scenarios in depth here.
In order to use Shiny within Quarto documents you will need the latest version of the shiny (>=0.9.0) and shinywidgets (>=0.3.1) packages. You can install the latest version of these with:
pip install --upgrade shiny shinywidgetsVS Code and Positron
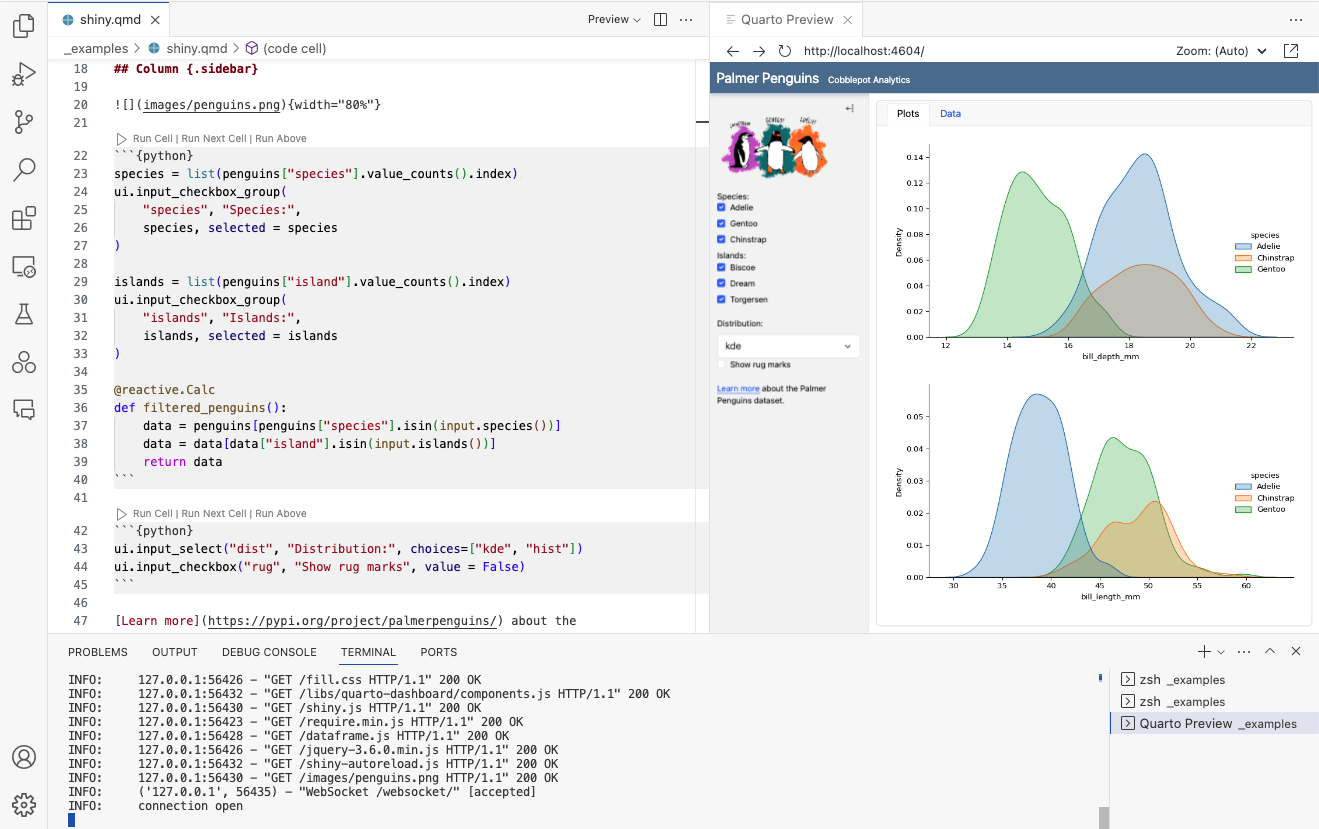
The Quarto Extension for VS Code and Positron (available on both OpenVSX and Microsoft’s marketplace) provides integrated support for previewing Shiny interactive documents (just use the Quarto: Preview command as you normally would with a static document):
Command Line
If you are using another notebook or text editor, you can also preview Shiny interactive documents from the command line via quarto preview. This works the same for notebooks (.ipynb) and plain text markdown (.qmd). For example:
Terminal
quarto preview example.ipynb
quarto preview example.qmd
There are a number of options to the preview command to control the port and host of the document server as well as whether a browser is automatically opened for the running document. You can learn more about these options with quarto preview help.
If you want to serve your document without the features of quarto preview (i.e. automatic re-rendering when the document changes) you can use the quarto serve command:
Terminal
quarto serve example.qmdDeployment
Shiny interactive documents are normal Shiny applications that are created using quarto render. In fact, you don’t need Quarto at all to serve interactive documents, rather, you can just shiny run the application generated by quarto render:
Terminal
quarto render example.qmd
shiny run app.py
Your deployed application will consist of both the HTML document and app.py script generated by quarto render:
example.html
example_files/
app.py
See the following documentation for information on deploying Shiny applications in various environments:
| Destination | Description |
|---|---|
| shinyapps.io | Cloud hosting service |
| Hugging Face | Cloud hosting service |
| Shiny Server | Open source application server |
| Posit Connect | Commerical publishing platform |
| Other Services | Custom server/hosting environment |
You can also deploy interactive Shiny documents in a serverless configuration (where Python runs in the browser via Pyodide). The Retirement Simulation is an example that demonstrates this workflow.
Debugging
You can run an interactive debugging session for Shiny documents by debugging the generated .py application file (e.g. hello-app.py). Use the Debug Shiny App menu command at the top right of the editor to launch a debugging session:
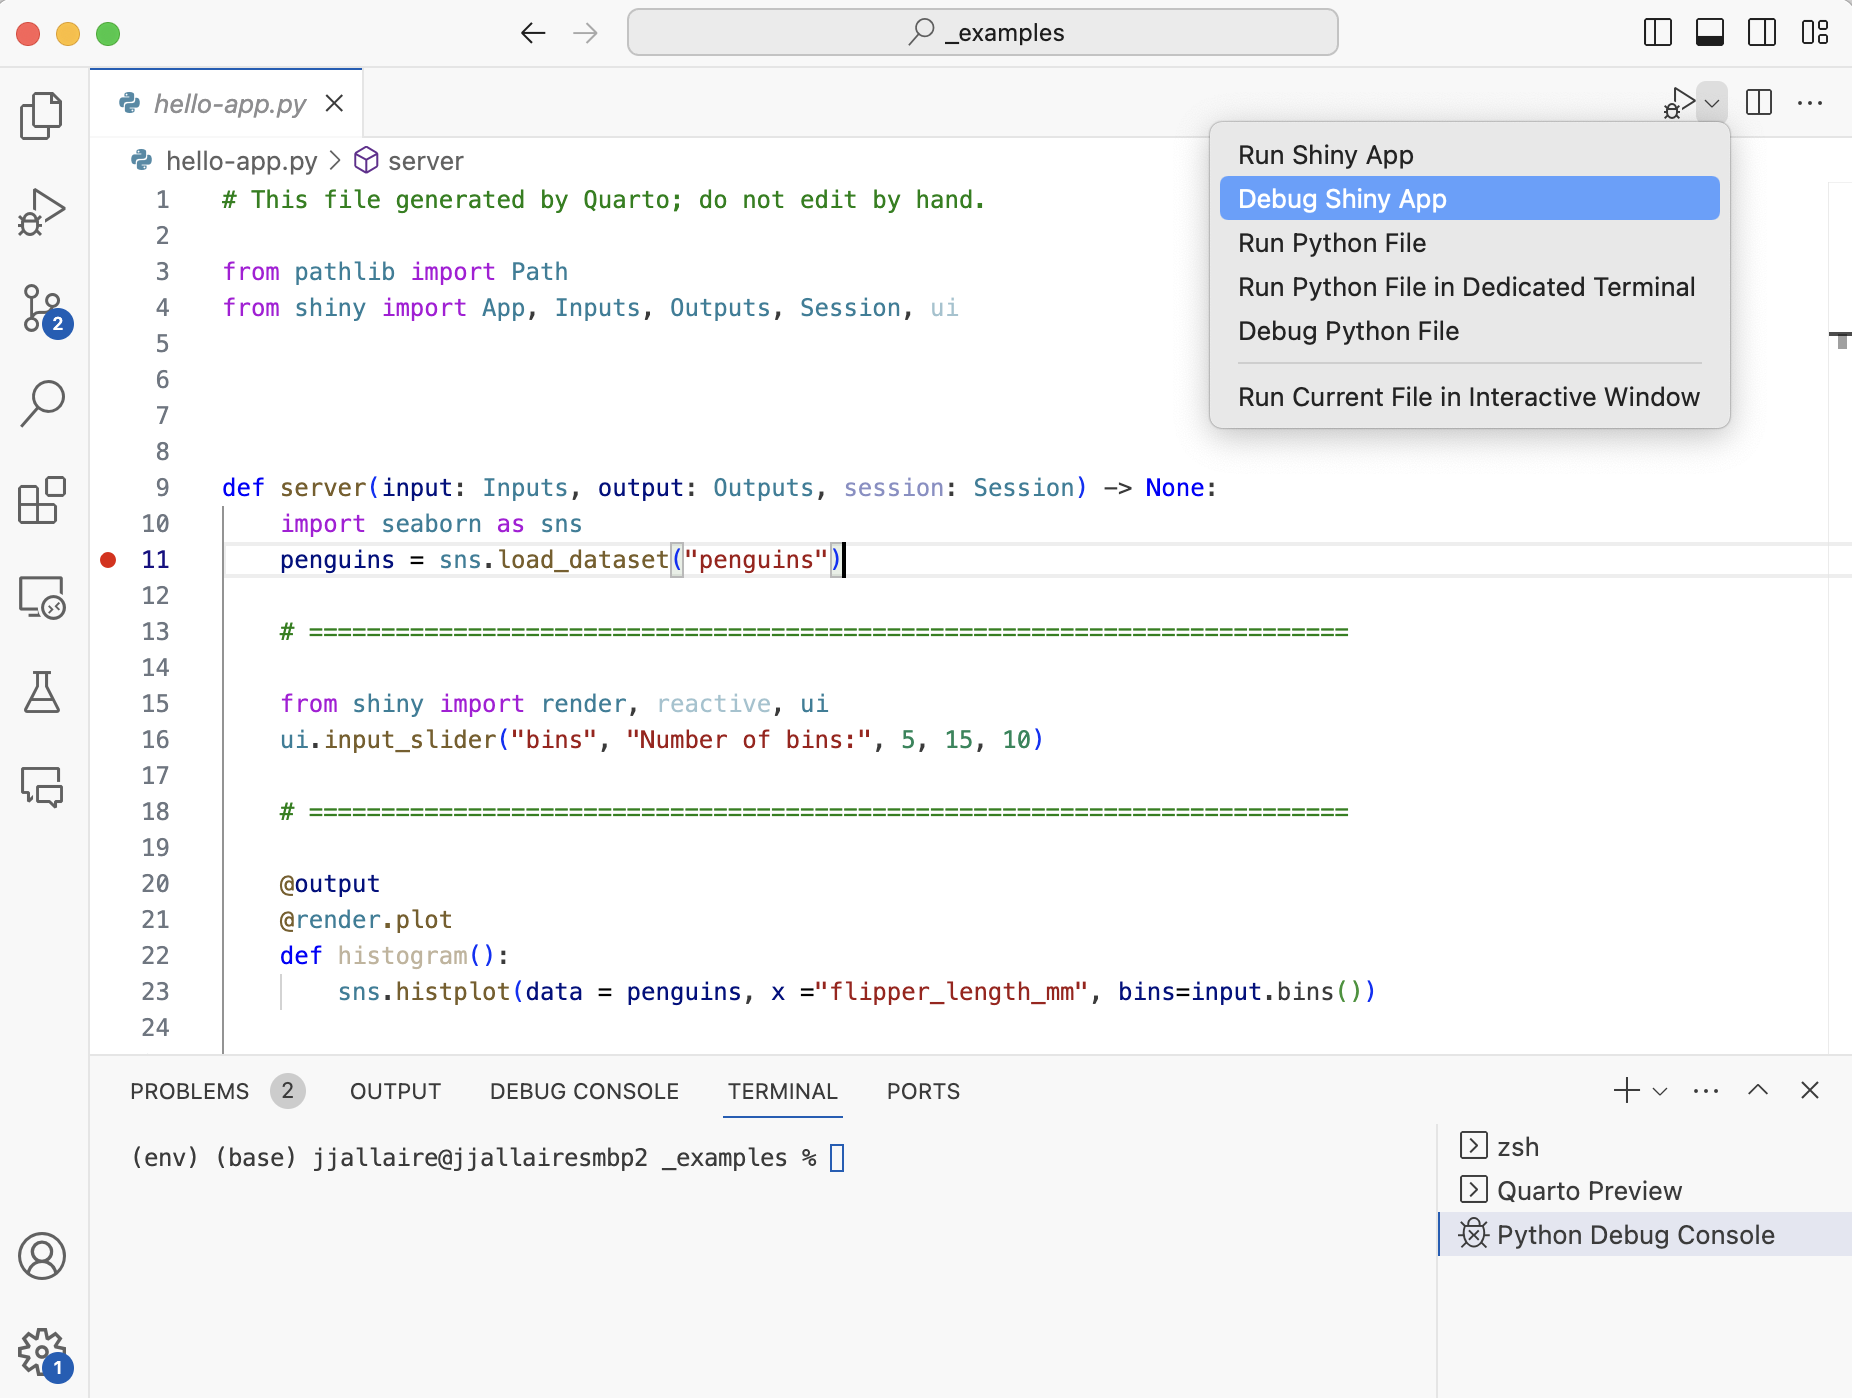
The file you are debugging (e.g. hello-app.py) is generated from your interactive document. You should therefore not edit this file directly (as it will be overwritten on the next render) but rather the source document from which it is generated (e.g. hello.qmd).
Learning More
To learn more about Shiny for Python interactive documents see the following articles:
Getting Started explains the basics of Shiny interactive documents.
Component Browser enumerates the available Shiny inputs and outputs, along with code snippets you can copy and paste into your dashboard.
Input Layout describes various ways to layout Shiny inputs (sidebars, input panels, attaching inputs directly to cards, etc.)
Execution Contexts goes in depth on when different code cells run (e.g. rendering vs. serving).
Shiny for Python provides in-depth documentation on all of the available UI and ouput widgets, as well as conceptual discussions on how things work.